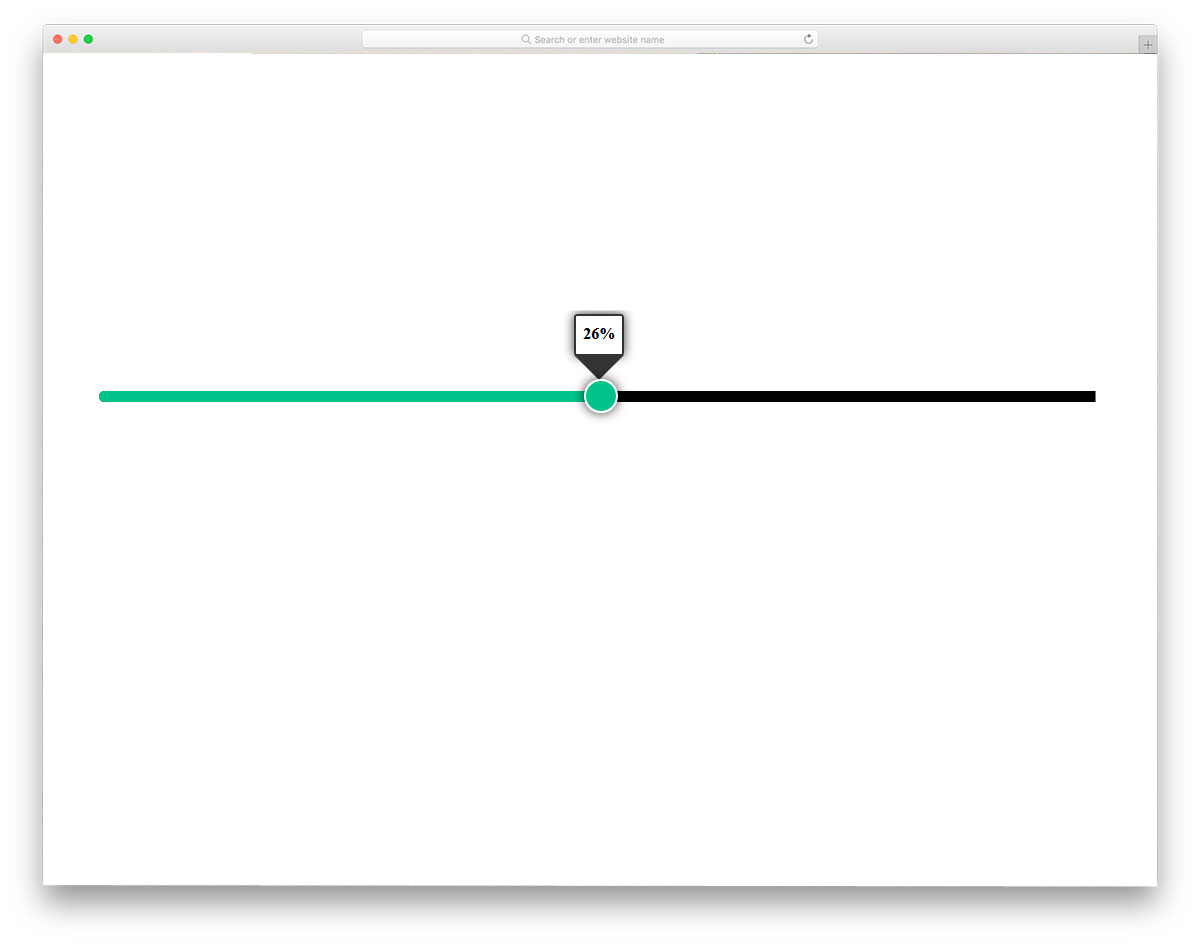
Para agregarle estilo a un <input type="range"> puedes hacerlo de la siguiente forma:
Si lo que buscas es solo dar color diferente a la barra de desplazamiento cuando se mueve el cursor puedes hacerlo obteniendo el valor del slider en una variable js (input) para luego pasarlo a una variable css (--value) y aplicarlo a la barra con un fondo de gradiente (anulando antes los estilos por defecto).
var input = document.querySelector("input[type=range]");
input.style.setProperty("--value", input.value);
input.addEventListener("input", function(evt) {
   input.style.setProperty("--value", input.value);
  },false);
input[type=range]{
    height: 20px;
width: 100%;
    height:.5em;
    display:block;
    margin:5em auto;
    -webkit-appearance: none;
    background-image:linear-gradient(to right, #02C38A  calc(var(--value)*1%), black 0);
  }
<input type="range" min="0" max="100" value="50">
Si quieres una barra mas estilizada y con una etiqueta como la de la imagen, ademas de lo anterior deberás agregar un código para asignar el valor del rango a la etiqueta y estilos para dar forma circular al cursor:
//para el input
  var Input = document.querySelector('#input1');
  Input.style.setProperty("--value", Input.value);

  if (Input) {
    var w = parseInt(window.getComputedStyle(Input, null).getPropertyValue('width'));

  Input.addEventListener("input", function(evt) {
    Input.style.setProperty("--value", Input.value);
},false);

  //para la etiqueta
  var etq = document.querySelector('.etiqueta');
  if (etq) {

    etq.innerHTML = Input.value+"%";

    var pxls = w / 100;

    etq.style.left = ((Input.value * pxls) - 15) + 'px';

    Input.addEventListener('input', function() {

      etq.innerHTML = Input.value+"%";
      etq.style.left = ((Input.value * pxls) - 15) + 'px';

    }, false);
  }
}
* {
  box-sizing: border-box;
  margin: 0;
  padding: 0;
}

.inputDiv {
  width: 90%;
  margin: 100px auto;
  position: relative;
}

input[type='range'] {
  display: block;
  width: 100%;
}

input[type='range']:focus {
  outline: none;
}

input[type='range'],
input[type='range']::-webkit-slider-runnable-track,
input[type='range']::-webkit-slider-thumb {
  -webkit-appearance: none;
}

input[type=range]::-webkit-slider-thumb {
  background-color: #02C38A;
  width: 21px;
  height: 21px;
  border: 3px solid #ddd;
  border-radius: 50%;
  margin-top: -9px;
}

input[type=range]::-moz-range-thumb {
  background-color: #02C38A;
  width: 16px;
  height: 16px;
  border: 3px solid #ddd;
  border-radius: 50%;
}

input[type=range]::-ms-thumb {
  background-color: #02C38A;
  width: 21px;
  height: 21px;
  border: 3px solid #ddd;
  border-radius: 50%;
}

input[type=range]::-webkit-slider-runnable-track {
  background-color: #333;
  height: 5px;
  -webkit-appearance: none;
  background-image:linear-gradient(to right, #02C38A calc(var(--value)*1%), black 0);
}

input[type=range]:focus::-webkit-slider-runnable-track {
  outline: none;
}

input[type=range]::-moz-range-track {
  -webkit-appearance: none;
  background-image:linear-gradient(to right, #02C38A calc(var(--value)*1%), black 0);
  height: 5px;
}

input[type=range]::-ms-track {
  background-color: #777;
  height: 3px;
}

.etiqueta {
  width: 30px;
  height: 26px;
  position: absolute;
  z-index: 9;
  background-color: #02C38A;
  color: white;
  font-size: 12px;
  text-align: center;
  padding-top: 7px;
  top: -45px;
}

.etiqueta:after {
  content: '';
  display: block;
  width: 10px;
  height: 10px;
  -webkit-transform: rotate(45deg);
  -moz-transform: rotate(45deg);
  -ms-transform: rotate(45deg);
  transform: rotate(45deg);
  z-index: 8;
  background-color: #02C38A;
  position: relative;
  left: 9px;
}
<div class="inputDiv">
  <div class="etiqueta"></div>
  <input type="range" value="50" min="0" max="100" autocomplete="off" id="input1">
</div>
y de esa forma te queda muy parecida a la de la imagen.
Ambas soluciones funcionan y se ven bien en Firefox, Chrome y otros navegadores.
Si deseas mas información sobre como dar estilos a estos elementos, puedes consultar los siguientes enlaces con los cuales aprendí y están 100% en español:
Dar estilo a los sliders, otro caso práctico
Dar estilo a los sliders, Input type range
Espero te sea de ayuda. Saludos.
